The 3D Configurator is an exploratory project to look into ways to enable users of the Embed Unit to customise a product. The idea behind this is that a retailer may be able to produce a product that comes with customisable sections, and the consumer can easily define what colour or material they want each section to be.
Inspiration
To begin with, I looked into similar applications for retail. These are some of my favourite finds.
Pickawood: configuring your shelves
Includes type of material, dragging shelves up and down, selecting number of colours, doors and drawers, etc. You can also see a 180 view (non-editable) and there is an AR mode.
Jali: making a dresser your own
Very detailed customisation settings, including how the item fits in your house (e.g. plain wall vs. a corner or an alcove). Can also customise finish, size (numerical input), style (e.g. tops, skirting, doors (incl. panelling, handles and hinges). Can also display or hide doors. The tool comes with three modes: zoom, pan and rotate. Configuration can be saved. Pricing updates depending on choices.
Normann-Copenhagen: simple and solid customisation of your furniture
Simple and straightforward (although limited) customisation of a chair. Includes different styles of legs (Steel vs Wood, and different types for each) and Upholstery (includes a list of styles and a description for each). Interesting to see pricing change depending on choices. Item rotates 360.
No 3D viewer, just static shots of all sides. Can modify the lenses and frame (front and temple) in three different styles, add engravings on different areas (and in three different types of fonts) and can also select the case (which is irrelevant to us). When ready, you just press ‘Buy now’. Also has ‘Try On’ mode which allows you to re-style the glasses as you’re on it (with some lagging).
VANS: customising your shoes is a very user-friendly experience
Very cool experience that allows you to modify the colours, materials and textures on the shoe by clicking on every section. You can also add embroidery. Particularly interesting is the Help section (at the top).
Objectives
- To design the integration of a 3D Configurator/editor within our current Embed Unit
- To enable end-customers to modify some parts of a product
- To enable retailers (our clients) to allow their customers to modify some parts of a product
- To design how the 3D Configurator is going to be configured
Initial designs
I started off by proposing the addition of an ‘Edit Mode’ button and text labels that would point at the sections that are configurable.
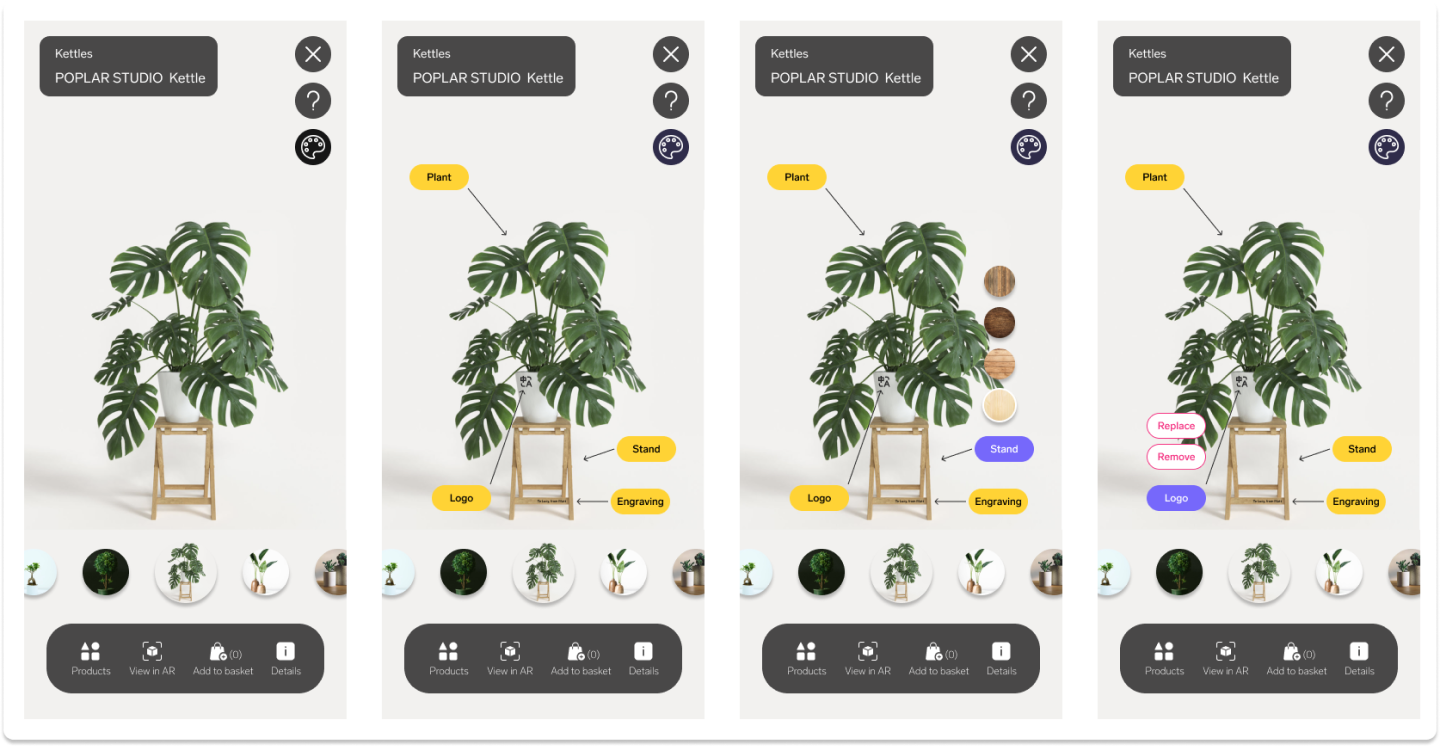
Then I thought of displaying those labels differently by stacking them up and having a fold/unfold system to display the different options for each section.
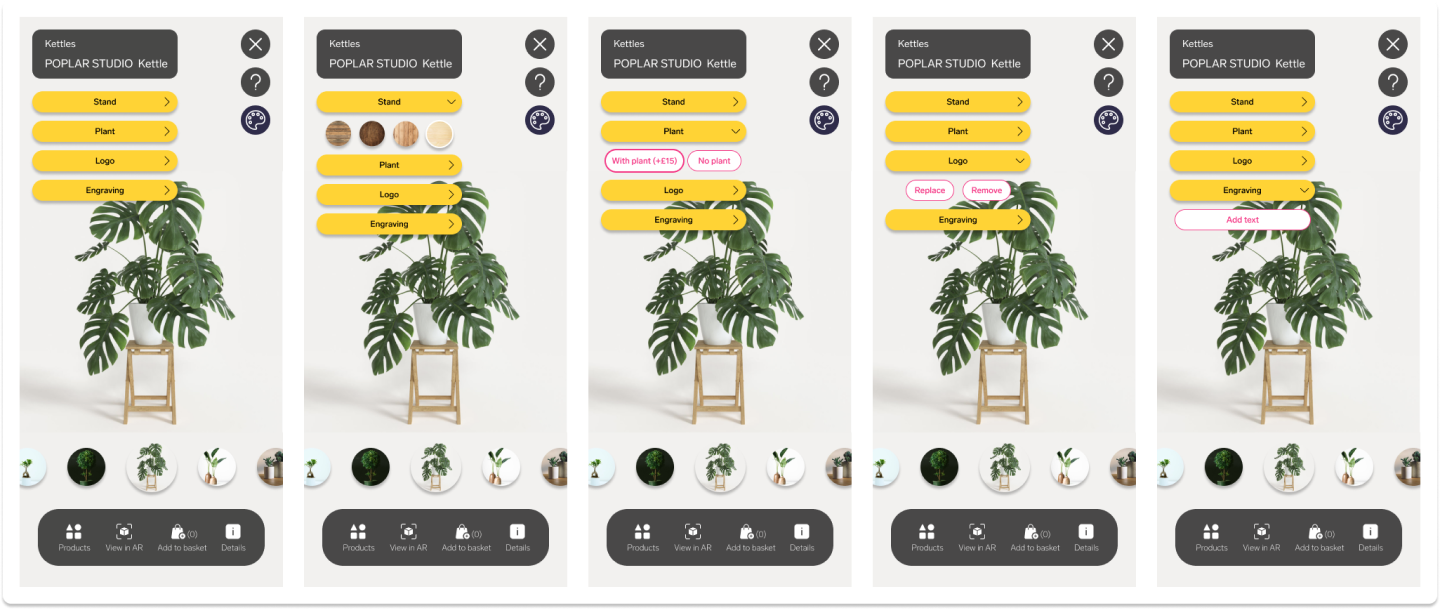
Then I tested my idea with a real product, a pair of shoes by Nike. This meant I had to include all the configurable sections for that particular pair of shoes, which quickly proved that my solution was not going to work.
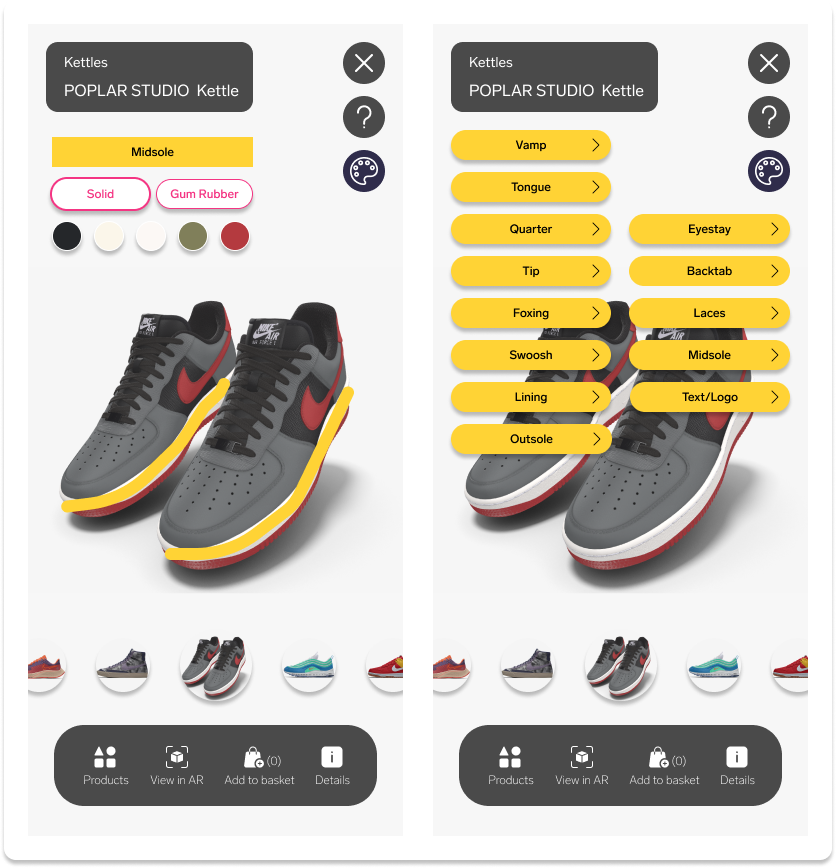
Removing the carousel
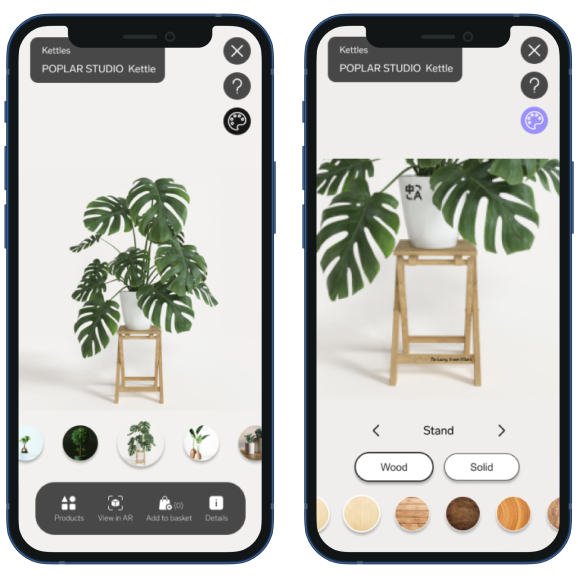
At some point (while doing something unrelated to work), I realised I could just get rid of the carousel while in Edit Mode. The carousel is then replaced by a new navigation that allows the user to move from one section to the next, meaning I don’t have to display labels hovering over the product.
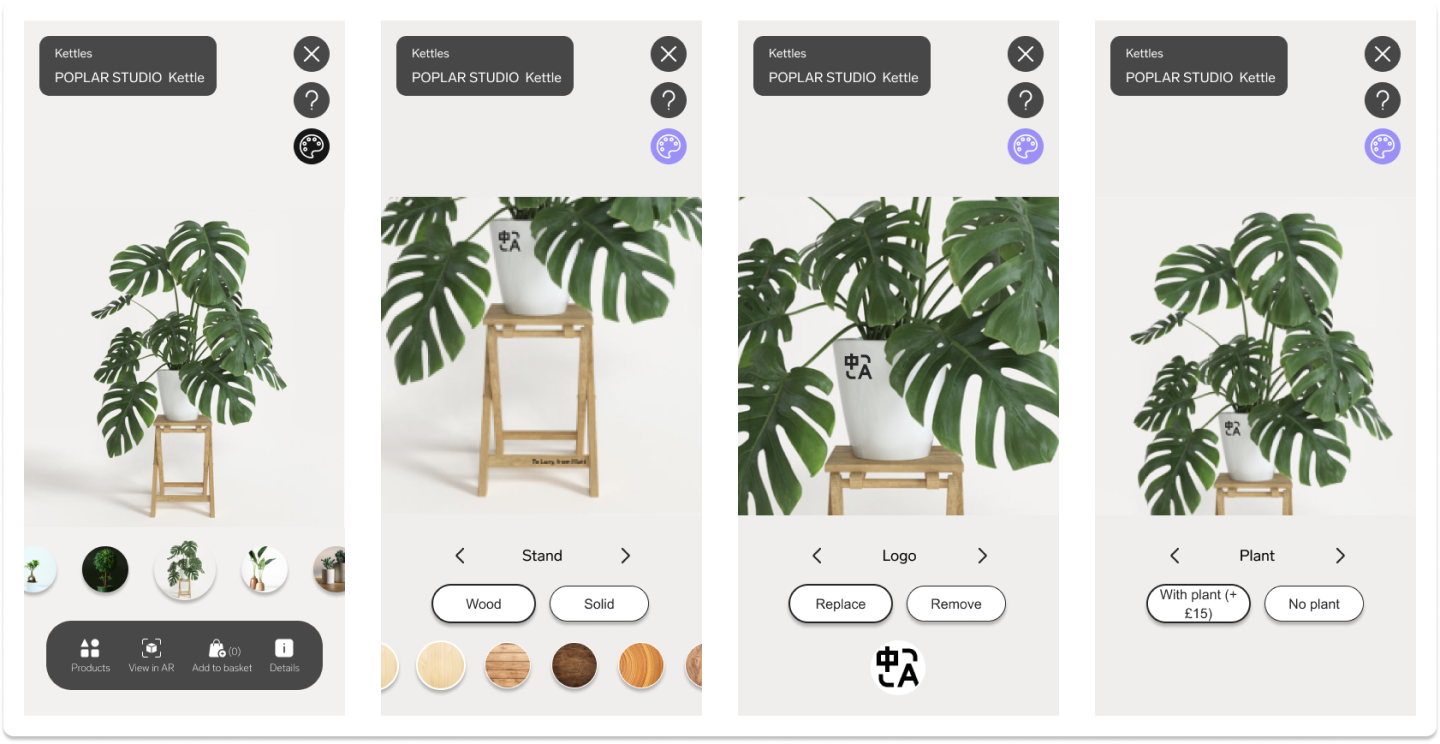
I also started considering interaction, and decided that the 3D model will be zoomed into depending on what section you are on. Like with any other 3D model in the Embed Unit, the user can also swirl it around and zoom in and out as they please.
The user can also navigate by tapping on different sections of the product as opposed to using the bottom navigation.
Proposed functionalities for the final 3D Configurator
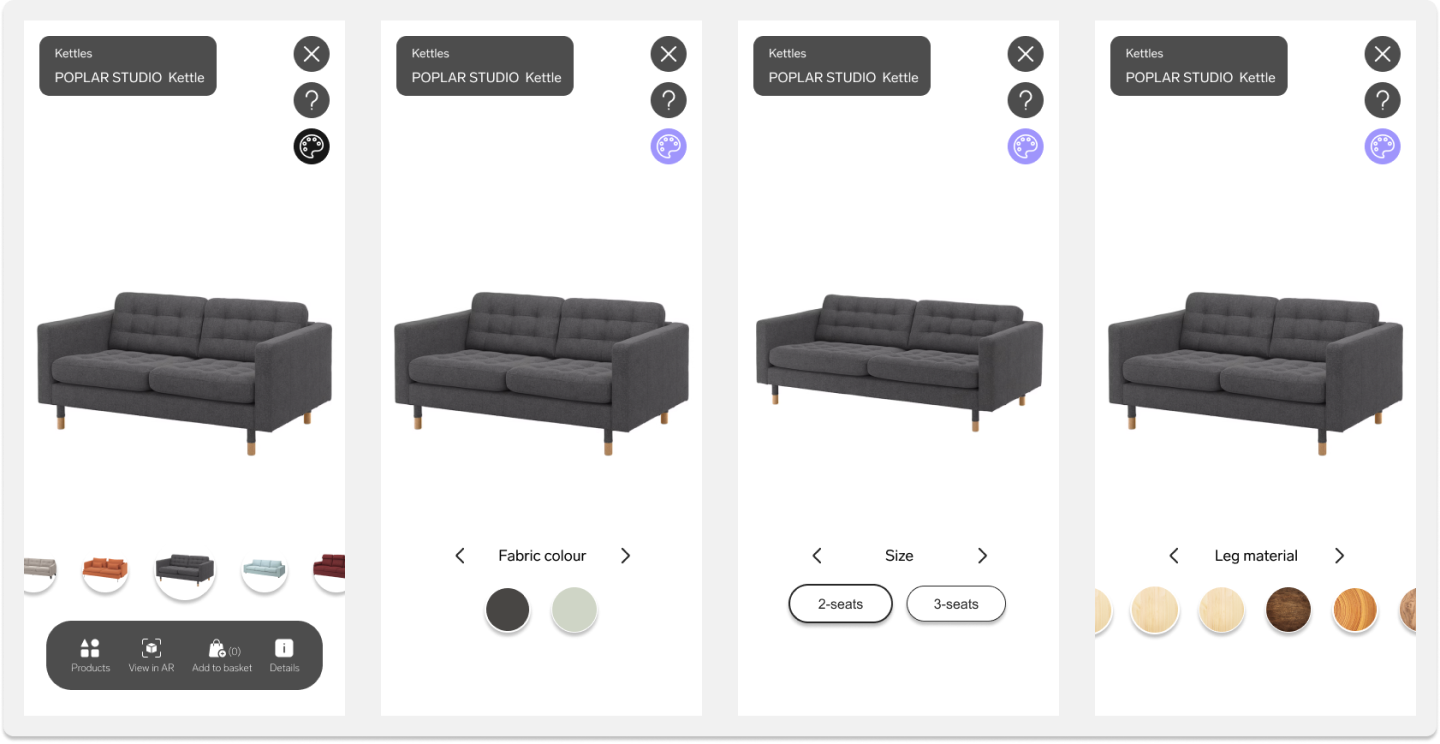
- A swatch carousel for colours, textures and materials
- A button carousel for sizes and materials or textures
- A switch to include or exclude sections or functionalities, or to define modes (e.g. open/closed)
- Image upload to add logos, photos or patterns
- Engravings to add custom text
Narrowing down the scope for an MVP
For our first iteration or MVP, I defined the minimum requirements for our new functionality.
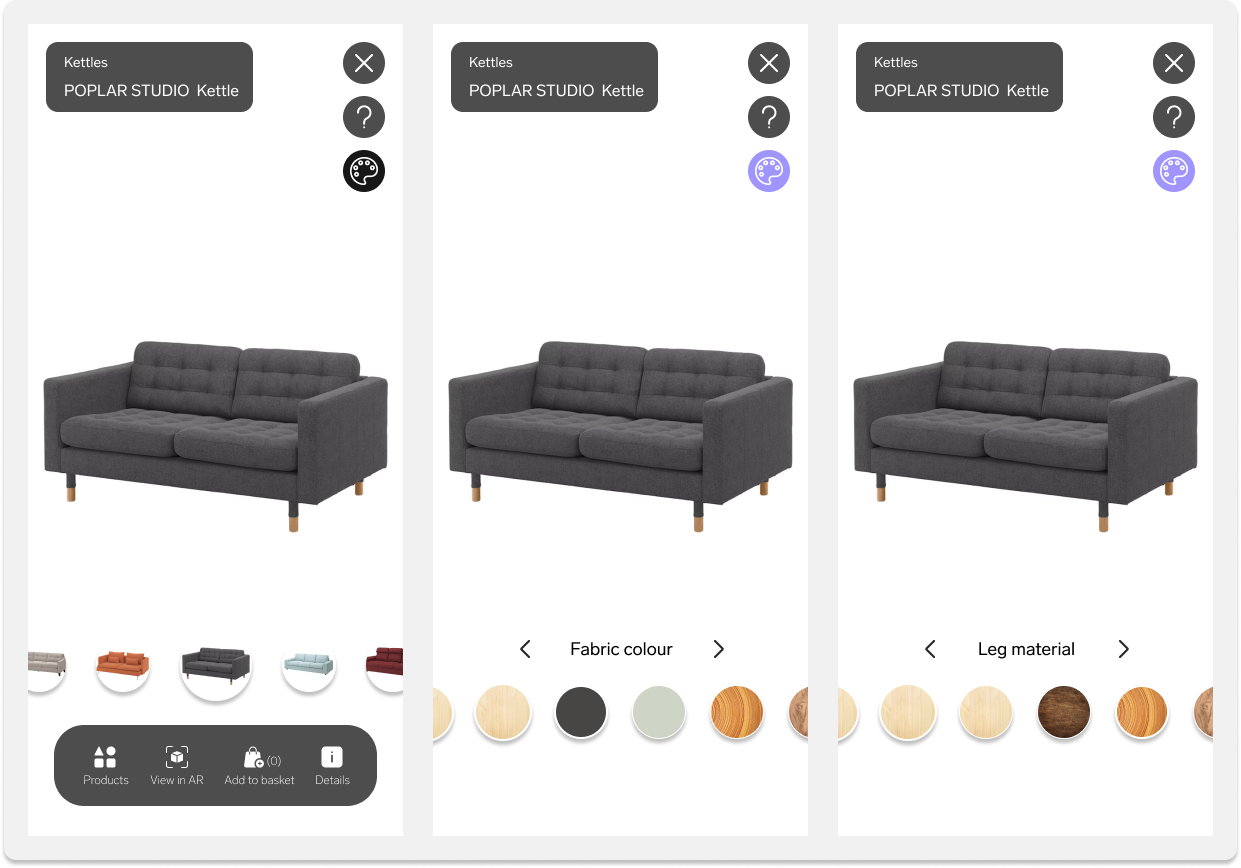
- A tool that enables switching up textures on a 3D model. This means users will be able to modify colour and fabric for different sections of a product by selecting an area and choosing from a selection of options.
- We will NOT be including engravings, additional images or patterns other than the ones provided nor the ability to modify the product by adding or removing sections or elements, changing its size or seeing the product in two or more ways (e.g. open or closed). This is so that we can simplify both design and implementation of the tool, as well as how the tool is set up through the CMS. However, the functionalities mentioned above may be incorporated in the future.
- Not viewable in AR - 3D viewer for now
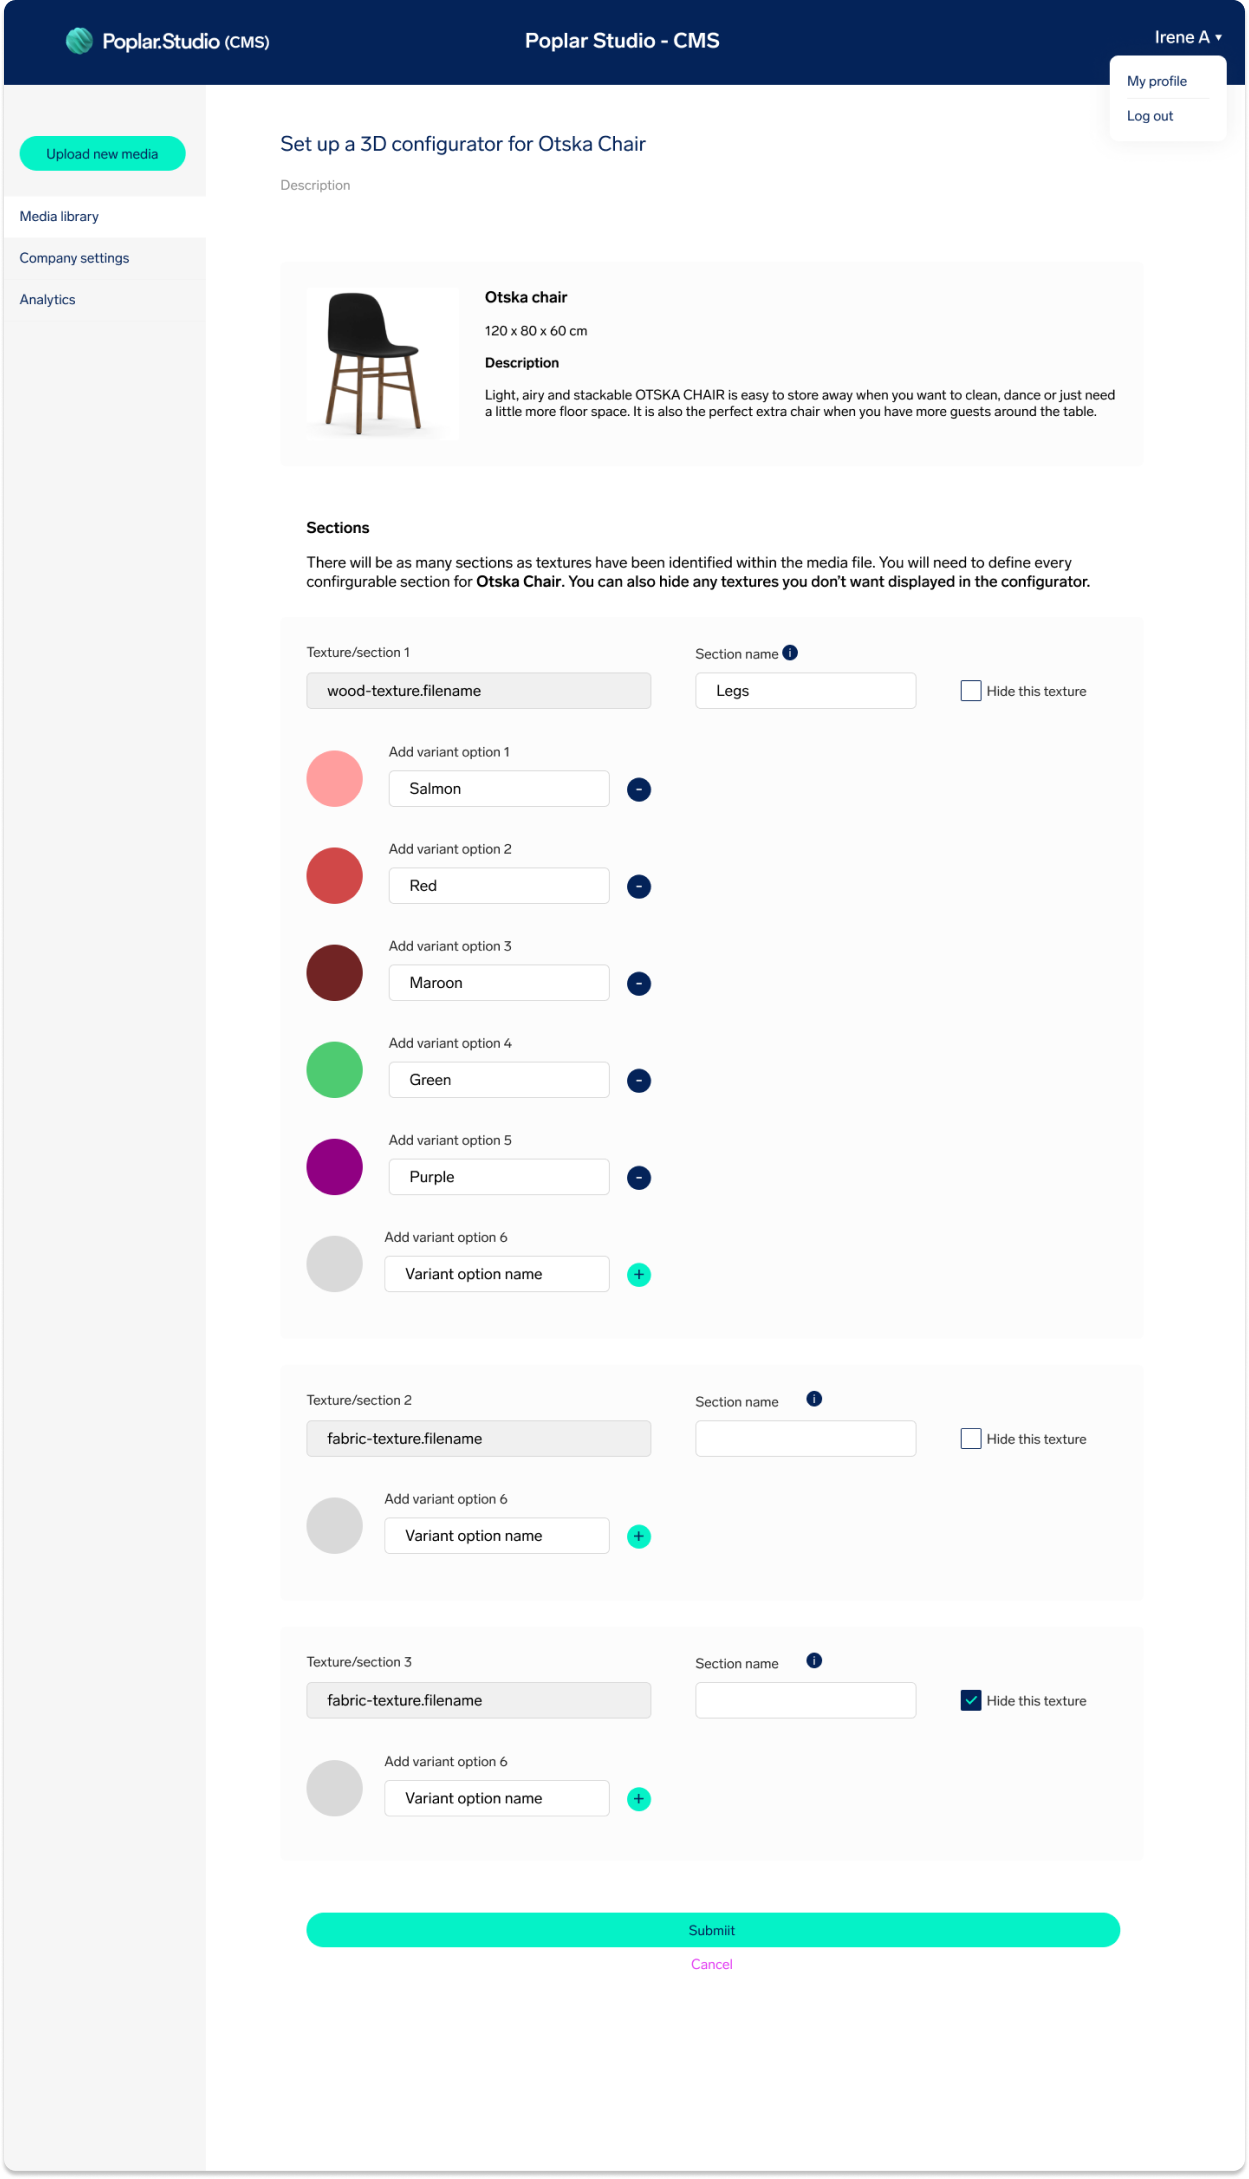
Designing the set up form for the CMS
As part of this project, I also had to think of how our customers would be setting up the options for the 3D Configurator. Since 3D files include materials (also known as textures) that match the number of configurable sections in a 3D model, I opted for a system that identified all the textures in a 3D file and displayed them in a form where the user could re-name the texture as a section.
They could then define a colour using the colour picker or a HEX code, which would be displayed alongside the section in the Configurator.