You can also view this case study in presentation format.
Background
As part of the CMS, we have developed two tools that give our clients control over how a 3D model will look (and fit a human head) in our Embed Unit.
We originally had a very rudimentary app that was quite tricky to use, so this project began by assessing the current functionality and looking at ways in which to improve it. Below are all the notes I took during the project.
What is this tool for?
VTO Products (items that go on human heads), require initial adjustment on a head model, as uploading the 3D model alone won’t guarantee that it’s placed the right way.
Problem hypothesis
Our users need to be able to quickly re-adjust the way a product fits on a head model without there being any friction points. This is so that their products fit their customers well when they are visualised in the embed unit. This will increase the amount of products they can add to the embed unit, while at the same reducing operational overhead on for the Poplar team, who at the moment are taking on a lot of the readjustment work.
Talking to our users
Because Poplar’s clients still require hand-holding from Account Management, Laurence O’Brien is often the one uploading 3D files on the customer’s behalf while he helps the through the transition.
When we told Laurence we were reviewing the Head Model Positioning Tool, his face lit up and he was excited that we were finally tackling that problem.
“As it currently stands, this tool is a pain to use”
I had a regular check-ins with Laurence throughout the entire process to make sure we were on the right path.
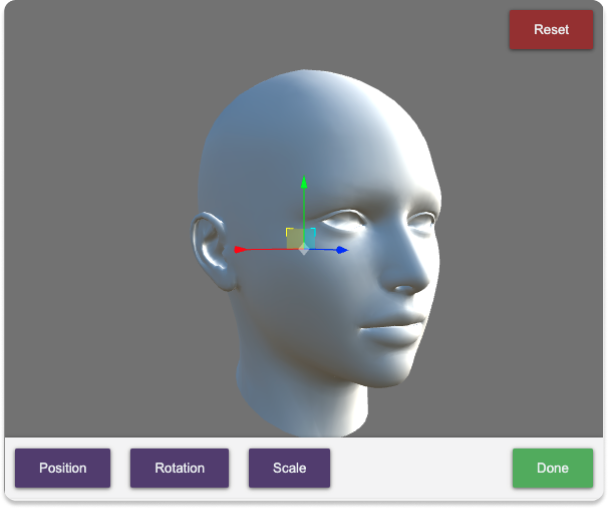
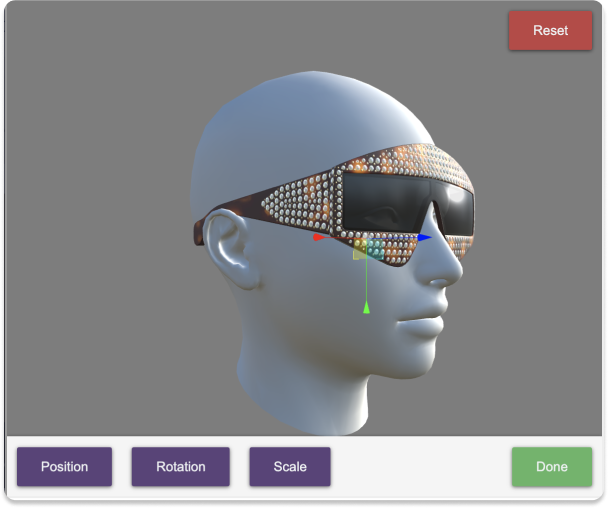
Testing the tool
- The tool doesn’t work very well, as at first I can’t even find my product. I soon realise that it’s behind the head by zooming into the head. I then move it to the front.
- The product is also very small, so I have to re-scale it to roughly match the size of the head.
- Once it’s the right size, I have to start adjusting its position in order for the product to sit on the Head Model’s nose.
- There’s a lot of going back and forth between scaling and positioning until it looks right.
- There is a Reset button that takes the whole thing back to its original state, but there is no Undo button for when you have made a mistake.
- I also asked one of our users (internal employee) for feedback on the tool, and he mentioned the same issues I and the Product Manager had come across.
Solution proposal
- Re-styling of the current tool
- Adding some way to help/support the user through the experience. Could it be a walkthrough? Could we detect when the product is right behind the head model? Could we have a tutorial that takes the user through the different functionalities?
- Could there be some way we could make the 3D axis easier to use than it currently is, as not everyone is familiar with shifting elements around in a three dimensional (digital) space (on a plane).
- Main three functions stay the same: Position, Rotation and Scale.
- Done becomes Save.
- Reset stays the same.
Solution proposal
- Re-styling of the current tool
- Adding some way to help/support the user through the experience. Could it be a walkthrough? Could we detect when the product is right behind the head model? Could we have a tutorial that takes the user through the different functionalities?
- I wonder if there’s some way we could make the 3D axis easier to use than it currently is, as not everyone is familiar with shifting elements around in a three dimensional (digital) space (on a plane).
- Main three functions stay the same: Position, Rotation and Scale.
- Done becomes Save.
- Reset stays the same.
New functionalities
- Undo
- Preview in AR (on myself) or at least on different ‘head models’ that look like actual real people.
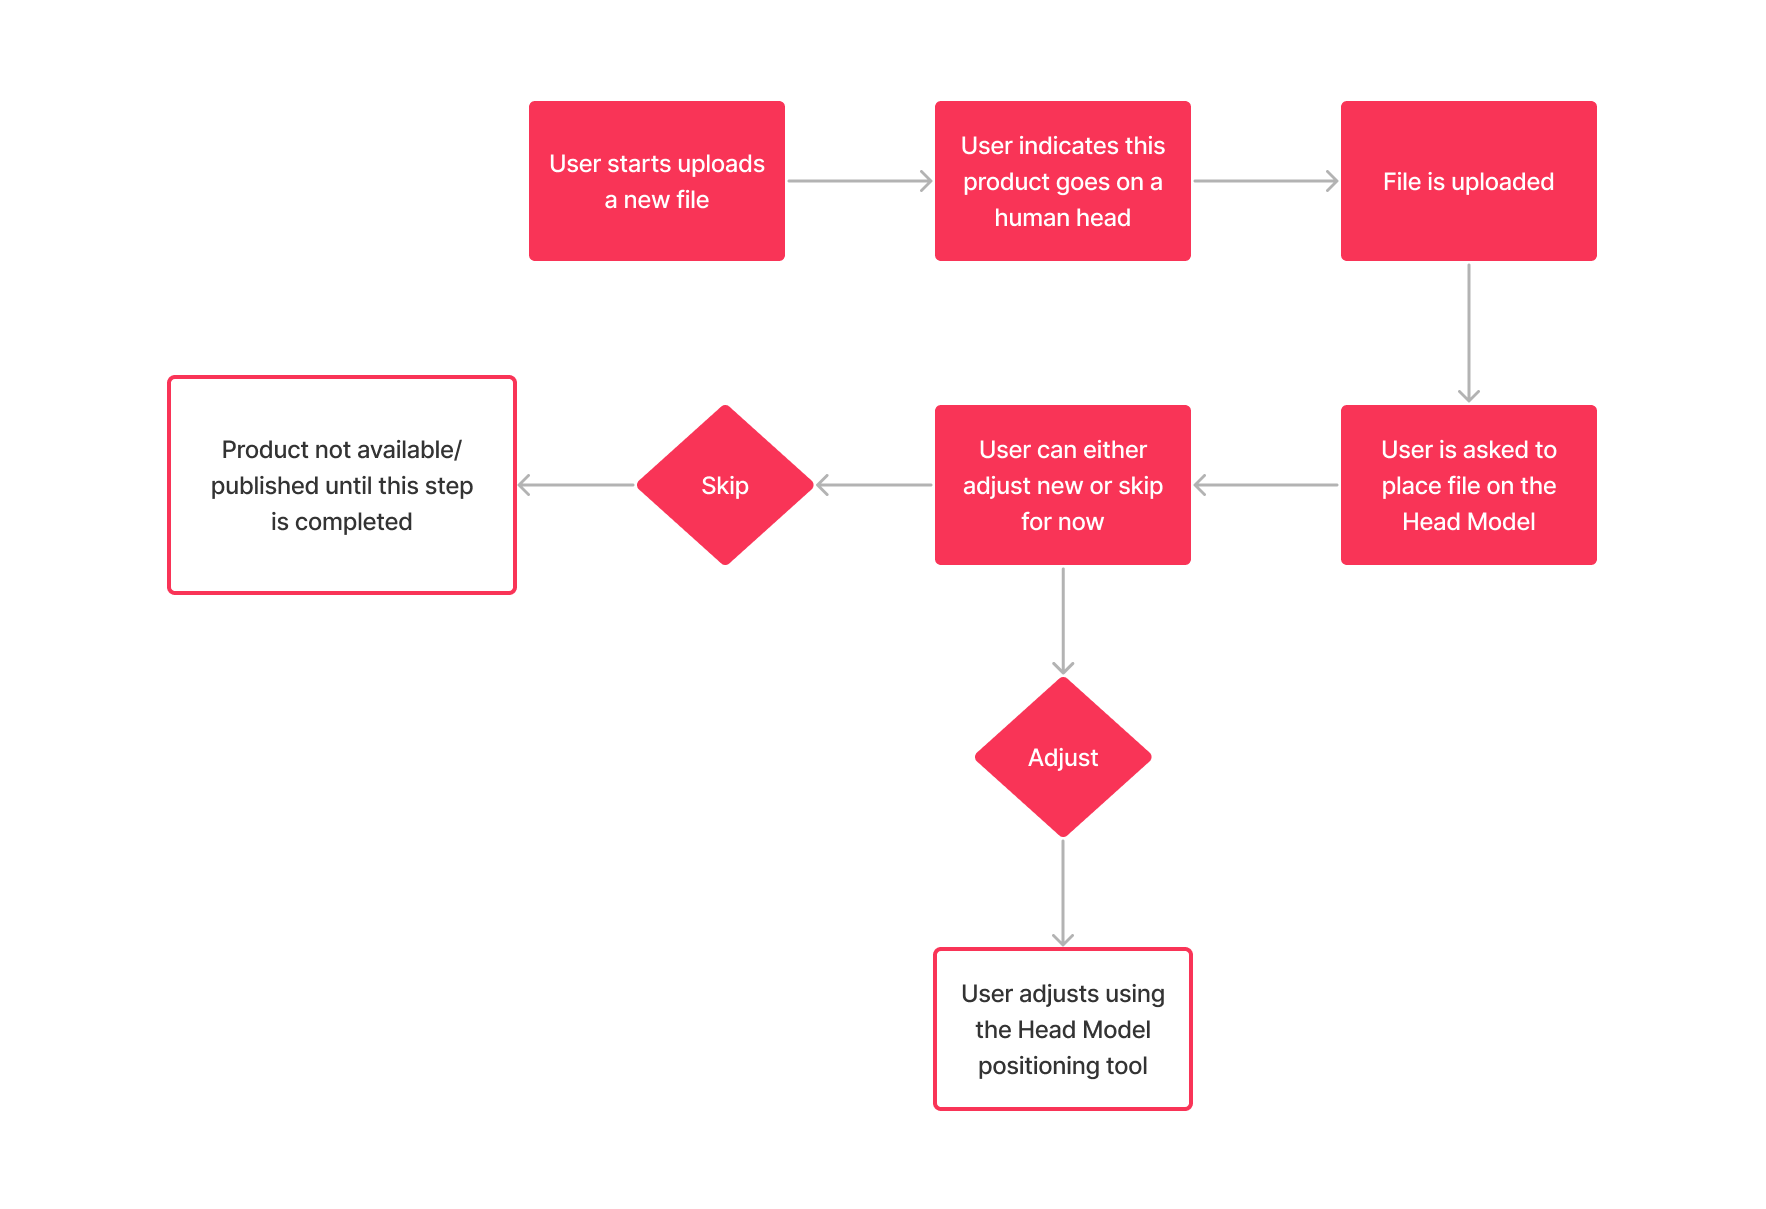
- As part of the upload flow, include a flow that prompts users to adjust the item right after uploading, with an option to skip.
- If they choose to skip, the media file will not become available and it’s not fit for purpose. The user should be alerted that this is the case, both before the Skip option is available, and also when attempting to publish the media file.
Discovering constraints with the engineers
I then brought my proposal to the engineers in my team and we looked at what could be easily implemented, what made sense to implement and what the initial scope for this tool might be.
Here are some of the things I found out:
- It’s not possible to configure default offsets of the model’s position, as the 3D models will need to be created on the CMS Head Model in order to achieve the desired and correct positioning.
- It is possible to adjust the positioning and scaling of the model up to 85% accuracy by initially defining where the item should go (in the upload form).
- We can include an extra (skippable) step after upload for users to adjust the model straight away.
- There will be some constraints in regards to the styling of the tool, but they will be awaiting for the designs to assess feasibility.
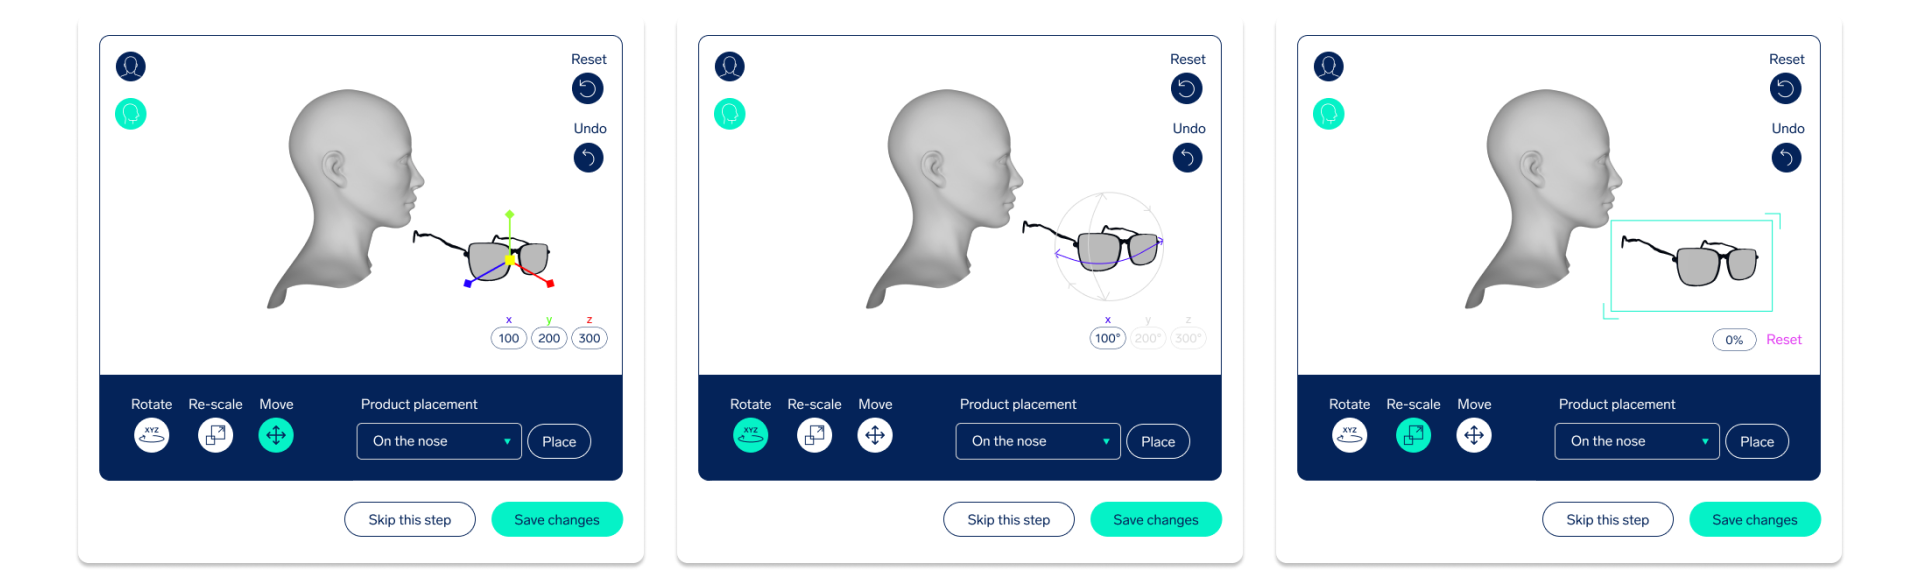
The tool in the context of a user journey
Final proposal and first design iteration
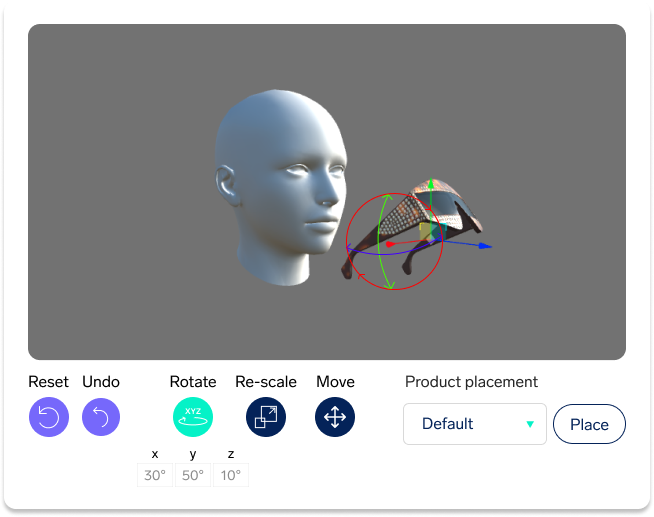
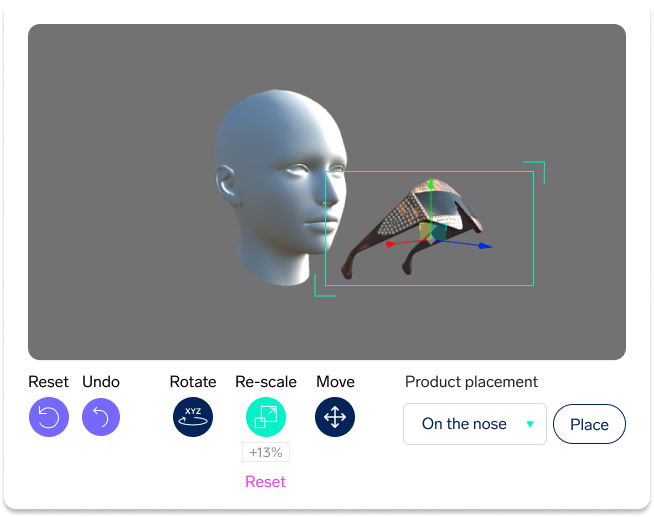
Functionalities
- Reset
- Undo
- Rotate
- Re-scale (+Reset size)
- Move
- Item positioning (or ‘Product placement’)
How it works
Rotate
- 0° = default position = original position based on the upload
- Whatever number was last input is the number we’ll keep
- Requires 3D coordinates
- Default position [x=0°, y=0°, z=0°]
- New change/number is applied upon clicking Enter or clicking away
Re-scale
- +/- number%
- +50% = 50% larger than previously
- To bring down to previous size you’d need to input [-50%]
- [0%] will give no different results
- Default = original size = whatever size the upload form deemed appropriate
- A [Default] or [Reset] button might make sense
- New change/number is applied upon clicking Enter
Move
- Requires 3D coordinates
- Default position [x=0, y=0, z=0]
- New change/number is applied upon clicking Enter

Testing with users
As mentioned, throughout the re-design process I checked in with Laurence on every stage.
Once I got to the mid-fidelity designs, we did a testing session where I asked him what he would do in order to complete certain tasks.
Because this should have been a highly interactive tool, I also asked him how he would expect the tool to behave based on the UI.
In all honesty, Laurence was very keen on the re-design and was excited for it to be implemented. He believed it would considerably speed up his process, especially the new Undo and Product placement functionalities.
Final designs
In the final designs we can see a more refined look, a better UI for the control of the coordinates and degrees and the extra option to move the Head Model into profile or front-facing modes.